12/16/2009

ActiveMQ 5.3 and JBoss 6.0 Example Using EJB 3.0


In this post I will go through an example to verify our ActiveMQ - JBoss Integration, which we discussed in an earlier post.

Software Requirements
Eclipse 
JBoss Application Server 6.0.0
JSF 2.0
JDK 1.6+
This article used Windows XP Professional as the operating system.

Development
We start our example by building EJB tier.
Step 1: Create an EJB Project in Eclipse. File -> New -> Project -> EJB ->EJB Project.

Click Next.
If you haven't created a Server Runtime for JBoss v6.0, create one now. Click New button in Target Runtime Section.

Since the version or Eclipse we downloaded doesn't show an option to add JBoss v6.0, add a Server Runtime with JBoss v5.0 with Server home directory pointing to JBoss v6.0 installation folder.

Select JBoss v5.0 and Click Next. Select JBoss v6.0 Installation folder as the Application Server Directory.

Click Finish.
In the New EJB Project Window, enter ActiveMQTestEJB as the project Name. Make Sure JBoss v5.0 Server Rumtime which we created in the last step as the selected Target Runtime. Select EJB Module Version as 3.0. Select Default configuration in Configuration section. Select Add project to and EAR and click New. Enter ActiveMQTestEAR as the EAR Project name.
Click Next.
Click Next.
Make Sure Create and EJB Client JAR option is selected and Name is ActiveMQTestEJBClient and Client JAR URI is ActiveMQTestEJBClient.jar. Click Finish.
Now you will be able to see 3 projects created in your workspace.
  • ActiveMQTestEAR
  • ActiveMQTestEJB
  • ActiveMQTestEJBClient
Step 2: Creating an EJB 3.0 Message Driven Bean which can consume messages from ActiveMQ.
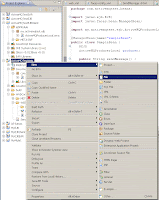
Right click the EJB project and Select New->Message Drive Driven Bean (EJB 3.x).
Enter following details:
Java Package : my.activemqtest.ejb
Class Name : ActiveMQConsumerBean
Select JMS
Select Queue as the Destination type.
Click Next. Accept default values and Click Finish.
Edit @MessageDriven Annotation to add ActiveMQ queue information as shown below.
@MessageDriven(activationConfig = {
 @ActivationConfigProperty(propertyName="destinationType", 
                           propertyValue="javax.jms.Queue"),
 @ActivationConfigProperty(propertyName="destination", 
                           propertyValue="queue.outbound"),
 @ActivationConfigProperty(propertyName="acknowledgeMode", 
                           propertyValue="Auto-acknowledge")
 })
Mention ActiveMQ Resource Adaptor configured in JBoss Application server using @ResourceAdapter annotation. The @org.jboss.annotation.ejb.ResourceAdapter annotation is used to tell the EJB container which resource adapter to use for the inflow implementation.
@ResourceAdapter("activemq-rar-5.3.0.rar")
Code your application login inside onMessage method of the MDB.
@MessageDriven(activationConfig = {
           @ActivationConfigProperty(propertyName="destinationType", 
                                     propertyValue="javax.jms.Queue"),
           @ActivationConfigProperty(propertyName="destination", 
                                     propertyValue="queue.outbound"),
           @ActivationConfigProperty(propertyName="acknowledgeMode", 
                                     propertyValue="Auto-acknowledge")
 })
@ResourceAdapter("activemq-rar-5.3.0.rar")
public class ActiveMQConsumerBean implements MessageListener {

    public ActiveMQConsumerBean() {}

    public void onMessage(Message message) {
     System.out.println("Message Received. Message Type is " + message);        
    }
}

Step 3: Create an EJB 3.0 Stateless Session Bean to post messages to ActiveMQ queue.
Right click ActiveMQTestEJB project -> New -> Session Bean (EJB 3.x).
Enter following details:
Java Package : my.activemqtest.ejb
Class Name : ActiveMQProducer
State Type : Stateless
Business InterFace : Local

Click Next.
Accept default values and click Finish.

Now we need to inject necessary resources into this stateless Bean using @Resource annotation.

Inject QueueConnectionFactory as below.
@Resource(mappedName="java:/activemq/QueueConnectionFactory")
 private static QueueConnectionFactory factory;

Inject Queue as below:
@Resource(mappedName="activemq/queue/outbound")
 private static Queue queue;

Implement message sending logic in a method.
@Stateless
public class ActiveMQProducer implements ActiveMQProducerLocal {
 
    @Resource(mappedName="java:/activemq/QueueConnectionFactory")
    private static QueueConnectionFactory factory;
 
    @Resource(mappedName="activemq/queue/outbound")
    private static Queue queue;

    public ActiveMQProducer() {}
    
    public void sendMessage() {
      try {
            QueueConnection qcon = factory.createQueueConnection();
            QueueSession qsession = qcon.createQueueSession(true, 0);
            QueueSender qsender = qsession.createSender(queue);
            TextMessage message = qsession.createTextMessage();
            message.setText("This is a test message");
            qsender.send(message);
            qsender.close();
            qsession.close();
            qcon.close();
      } catch (JMSException e) {
            e.printStackTrace();
      }
    }
}
Don't forget to add sendMessage method declaration in ActiveMQProducerLocal class. ActiveMQProducerLocal class will be in the ActiveMQTestEJBClient project.
package my.activemqtest.ejb;
import javax.ejb.Local;

@Local
public interface ActiveMQProducerLocal {
    public void sendMessage();
}

Step 4: Now it is time to create the UI. I have choosen JSF 2.0 web framework to create the UI.
Click File -> New -> Dynamic Web Project.
Enter following details in New Dynamic Web Project window.
Project Name : ActiveMQTestWeb
Dynamic Web Module Version : 2.5
Configuration : Default Configuration
Add ActiveMQTestWeb project to ActiveMQTestEAR.


Click Finish.
Now add JSF 2.0 support for our web application module. Add Faces configurations into web.xml.
<?xml version="1.0" encoding="UTF-8"?>
<web-app xmlns:xsi="http://www.w3.org/2001/XMLSchema-instance"
            xmlns="http://java.sun.com/xml/ns/javaee" 
            xmlns:web="http://java.sun.com/xml/ns/javaee/web-app_2_5.xsd"
       xsi:schemaLocation="http://java.sun.com/xml/ns/javaee 
       http://java.sun.com/xml/ns/javaee/web-app_2_5.xsd"
       version="2.5">
 <servlet>
   <servlet-name>Faces Servlet</servlet-name>
   <servlet-class>javax.faces.webapp.FacesServlet</servlet-class>
 </servlet>
 <servlet-mapping>
   <servlet-name>Faces Servlet</servlet-name>
   <url-pattern>*.jsf</url-pattern>
 </servlet-mapping>
 <context-param>
   <param-name>javax.faces.PROJECT_STAGE</param-name>
   <param-value>Development</param-value>
 </context-param>
 <welcome-file-list>
   <welcome-file>index.jsp</welcome-file>
   <welcome-file>index.html</welcome-file>
 </welcome-file-list>
</web-app>

Next we will create a web page to test our ActiveMQ producer EJB and Receiver EJB. Create an XHTML in the our "ActiveMQTestWeb".
Right click "ActiveMQTestWeb" project -> New -> File.

Enter "SendMessage.xhtml" as the file name and click "Finish".
<!DOCTYPE html PUBLIC "-//W3C//DTD XHTML 1.0 Transitional//EN"
  "http://www.w3.org/TR/xhtml1/DTD/xhtml1-transitional.dtd">
<html xmlns="http://www.w3.org/1999/xhtml"
      xmlns:h="http://java.sun.com/jsf/html">
<h:head><title>JSF 2.0: ActiveMQ Message Sending Test Page</title>
<link href="./css/styles.css" 
      rel="stylesheet" type="text/css"/> 
</h:head>
<h:body>
 <h:messages/>
 <h:form>
  <h:commandButton value="Send Message" action="#{sampleBean.sendMessage}"/>
 </h:form>
</h:body>
</html>
Next we will create JSF ManagedBean.
package com.activemqtest.beans;

import javax.ejb.EJB;
import javax.faces.bean.ManagedBean;

import my.activemqtest.ejb.ActiveMQProducerLocal;

@ManagedBean(name="sampleBean")
public class SampleBean {
 @EJB
 ActiveMQProducerLocal producer;
 
 public void sendMessage() {
   producer.sendMessage();
   FacesContext.getCurrentInstance().addMessage("form1:btn", 
  new FacesMessage("Message Send successfully"));
 }
}

Deploy the application JBoss Application Server and you are ready to go.

Resources
ActiveMQTestEAR.ear

12/15/2009

Integrating ActiveMQ 5.3.0 with JBoss 6.0.0


This document explains how ActiveMQ 5.3.0 can be configured in JBoss Application Server 6.0.0 as an embedded broker.

Software Requirements
Here is the list of softwares used in this document.
Apache ActiveMQ 5.3.0
JBoss AS 6.0.0
JDK 1.6+
This article used Windows XP Professional as the operating system.

Intallation
Step 1: Install JDK 1.6 and verify it runs correctly. After installing Java set JAVA_HOME and update PATH environment variables.
C:\>java -version
java version "1.6.0_17"
Java(TM) SE Runtime Environment (build 1.6.0_17-b04)
Java HotSpot(TM) Client VM (build 14.3-b01, mixed mode, sharing)
Step 2:  Install JBoss Application Server 6.0.0 and make sure Server starts correctly. After downloading jboss-6.0.0M1.zip, extract it to a folder. After extrating start the server using run command.

Goto JBoss extracted folder and execute below commands.
C:\>cd JBoss\jboss-6.0.0.M1\bin
C:\JBoss\jboss-6.0.0.M1\bin>run
First few line shows the configuration used by JBoss Server. Check the last line to see whether the server has started propertly.
C:\JBoss\jboss-6.0.0.M1\bin>run
Calling C:\JBoss\jboss-6.0.0.M1\bin\run.conf.bat
===============================================================================

  JBoss Bootstrap Environment

  JBOSS_HOME: C:\JBoss\jboss-6.0.0.M1

  JAVA: C:\Program Files\Java\jdk1.6.0_14\bin\java

  JAVA_OPTS: -Dprogram.name=run.bat -Xms128M -Xmx512M -XX:MaxPermSize=256M -Dsun.rmi.dgc.client.gcInterval=3600000 -Dsun.rmi.dgc.server.gcInterval=3600000 -Dorg.jboss.resolver.warning=true -server

  CLASSPATH: C:\Program Files\Java\jdk1.6.0_14\lib\tools.jar;C:\JBoss\jboss-6.0.0.M1\bin\run.jar

===============================================================================

17:01:33,828 INFO  [AbstractJBossASServerBase] Server Configuration:
        JBOSS_HOME URL: file:/C:/JBoss/jboss-6.0.0.M1/
        Bootstrap: $JBOSS_HOME\server/default/conf/bootstrap.xml
        Common Base: $JBOSS_HOME\common/
        Common Library: $JBOSS_HOME\common/lib/
        Server Name: default
        Server Base: $JBOSS_HOME\server/
        Server Library: $JBOSS_HOME\server/default/lib/
        Server Config: $JBOSS_HOME\server/default/conf/
        Server Home: $JBOSS_HOME\server/default/
        Server Data: $JBOSS_HOME\server/default/data/
        Server Log: $JBOSS_HOME\server/default/log/
        Server Temp: $JBOSS_HOME\server/default/tmp/
17:01:33,875 INFO  [AbstractServer] Starting: JBossAS [6.0.0.M1 (build: SVNTag=JBoss_6_0_0_M1 date=200912040958)]
17:01:35,515 INFO  [AbstractMCServerBase] Starting Microcontainer, Main bootstrapURL=file:/C:/JBoss/jboss-.0.0.M1/server/default/conf/bootstrap.xml
17:01:37,250 INFO  [VFSCacheFactory] Initializing VFSCache [org.jboss.virtual.plugins.cache.CombinedVFSCache]
17:01:37,250 INFO  [VFSCacheFactory] Using VFSCache [CombinedVFSCache[real-cache: null]]
17:01:38,140 INFO  [CopyMechanism] VFS temp dir: C:\JBoss\jboss-6.0.0.M1\server\default\tmp
17:01:38,140 INFO  [ZipEntryContext] VFS force nested jars copy-mode is enabled.
17:01:41,921 INFO  [ServerInfo] Java version: 1.6.0_14,Sun Microsystems Inc.
17:01:41,921 INFO  [ServerInfo] Java Runtime: Java(TM) SE Runtime Environment (build 1.6.0_14-b08)
17:01:41,921 INFO  [ServerInfo] Java VM: Java HotSpot(TM) Server VM 14.0-b16,Sun Microsystems Inc.
17:01:41,921 INFO  [ServerInfo] OS-System: Windows XP 5.1,x86
...............
...............
17:03:22,437 INFO  [AjpProtocol] Starting Coyote AJP/1.3 on ajp-127.0.0.1-8009
17:03:22,468 INFO  [AbstractServer] JBossAS [6.0.0.M1 (build: SVNTag=JBoss_6_0_0_M1 date=200912040958)] Started in 1m:48s:593ms
To ensure the server has started, visit http://localhost:8080/web-console/ in your favorite browser and make sure you can see JBoss Web Console.

Now stop JBoss Server using shutdown script(inside \bin folder) or use Ctrl-C.

Integrating Apache ActiveMQ with the JBoss Application Server. 
Download ApacheMQ using the link above. After downloading, extract it to a folder and verify that ActiveMQ RAR file is included. This file can be located at [ACTIVEMQ_INSTALL_DIR]\lib\optional folder.
C:\Softwares\apache-activemq-5.3.0\lib\optional>dir
           102,631 activeio-core-3.1.2.jar
            81,267 activemq-jmdns_1.0-5.3.0.jar
           116,081 activemq-optional-5.3.0.jar
            38,517 activemq-pool-5.3.0.jar
         6,905,784 activemq-rar-5.3.0.rar
           175,130 activemq-xmpp-5.3.0.jar
           118,726 commons-beanutils-1.6.1.jar
            30,085 commons-codec-1.2.jar
           575,389 commons-collections-3.2.1.jar
           121,757 commons-dbcp-1.2.2.jar
           305,001 commons-httpclient-3.1.jar
           197,067 commons-net-2.0.jar
            87,077 commons-pool-1.4.jar
            37,477 geronimo-j2ee-connector_1.5_spec-2.0.0.jar
            67,758 jettison-1.1.jar
           367,444 log4j-1.2.14.jar
           325,942 spring-aop-2.5.6.jar
           488,282 spring-beans-2.5.6.jar
           476,940 spring-context-2.5.6.jar
           285,491 spring-core-2.5.6.jar
           195,350 spring-jms-2.5.6.jar
            15,980 spring-oxm-tiger-1.5.8.jar
           231,173 spring-tx-2.5.6.jar
           474,413 wstx-asl-3.0.1.jar
           130,519 xbean-spring-3.6.jar
            24,544 xmlpull-1.1.3.4d_b4_min.jar
           431,406 xstream-1.3.1.jar
In our case ActiveMQ RAR file name will be activemq-rar-5.3.0.rar.

Now go to JBoss intallation folder and create a folder for ActiveMQ inside deploy directory for the required context. Here we are using default JBoss context.
C:\JBoss\jboss-6.0.0.M1\server\default\deploy>mkdir activemq-rar-5.3.0.rar
Extract the contents of ActiveMQ RAR file(activemq-rar-5.3.0.rar) to this folder.
102,631 activeio-core-3.1.2.jar
         2,923,854 activemq-core-5.3.0.jar
           147,717 activemq-protobuf-1.0.jar
            85,474 activemq-ra-5.3.0.jar
             4,467 aopalliance-1.0.jar
             1,868 broker-config.xml
            52,915 commons-logging-1.1.jar
            44,598 commons-logging-api-1.1.jar
           197,067 commons-net-2.0.jar
         2,141,382 derby-10.1.3.1.jar
            16,030 geronimo-j2ee-management_1.0_spec-1.0.jar
            20,220 geronimo-j2ee-management_1.1_spec-1.0.1.jar
           152,481 kahadb-5.3.0.jar
           367,444 log4j-1.2.14.jar
             1,625 log4j.properties
    <DIR>          META-INF
           488,282 spring-beans-2.5.6.jar
           476,940 spring-context-2.5.6.jar
           285,491 spring-core-2.5.6.jar
           130,519 xbean-spring-3.6.jar
Now we can start configuring ActiveMQ.

Edit ra.xml file inside [JBOSS_HOME]\server\default\deploy\activemq-rar-5.3.0.rar\META-INF folder.
<config-property>
   <description>
      The URL to the ActiveMQ server that you want this connection to 
      connect to. If using an embedded broker, this value should be                
      'vm://localhost'.
   </description>
   <config-property-name>ServerUrl</config-property-name>
   <config-property-type>java.lang.String</config-property-type>
   <config-property-value>vm://localhost</config-property-value>
</config-property>
<config-property>
   <description>
     Sets the XML configuration file used to configure the embedded ActiveMQ broker via 
     Spring if using embedded mode. BrokerXmlConfig is the filename which is assumed 
     to be on the classpath unless a URL is specified. So a value of foo/bar.xml 
     would be assumed to be on the classpath whereas file:dir/file.xml would use the file system. 
     Any valid URL string is supported.              
    </description>
    <config-property-name>BrokerXmlConfig</config-property-name>
    <config-property-type>java.lang.String</config-property-type>
    <config-property-value>xbean:broker-config.xml</config-property-value>
</config-property>
A Pre-Configured ra.xml can be downladed.

The broker-config.xml file inside [JBOSS_HOME]\server\default\deploy\activemq-rar-5.3.0.rar is the ActiveMQ configuration file. This is the file used to configure ActiveMQ. The default contents of this file are usable, but should be customized to suit your environment.

A Pre-Configured broker-config.xml can be downloaded.

Now start JBoss server to ensure it start without any errors using the same commands we used before. If JBoss Server starts without any errors you can move to next step. Stop the server and continue to next step.

Next step is to configure JBoss to initialize and start ActiveMQ whenever JBoss starts up. This is accomplished by putting an XML (activemq-jms-ds.xml) inside [JBOSS_HOME]\server\default\deploy.

A Pre-Configured activemq-jms-ds.xml can be downloaded.

 Now start JBoss server to ensure it start without any errors using the same commands we used before.  Examine the startup messages for ActiveMQ messages.
21:20:17,453 INFO  [RARDeployment] Required license terms exist, view vfszip:/C:
/JBoss/jboss-6.0.0.M1/server/default/deploy/mail-ra.rar/META-INF/ra.xml
21:20:17,515 INFO  [RARDeployment] Required license terms exist, view vfszip:/C:
/JBoss/jboss-6.0.0.M1/server/default/deploy/quartz-ra.rar/META-INF/ra.xml
21:20:17,968 INFO  [AdminObject] Bound admin object 'org.apache.activemq.command
.ActiveMQQueue' at 'activemq/queue/outbound'
21:20:17,984 INFO  [AdminObject] Bound admin object 'org.apache.activemq.command
.ActiveMQTopic' at 'activemq/topic/inbound'
21:20:18,171 INFO  [ConnectionFactoryBindingService] Bound ConnectionManager
'jboss.jca:service=ConnectionFactoryBinding,name=activemq/QueueConnectionFactory'
to JNDI name 'java:activemq/QueueConnectionFactory'
21:20:18,281 INFO  [ConnectionFactoryBindingService] Bound ConnectionManager
'jboss.jca:service=ConnectionFactoryBinding,name=activemq/TopicConnectionFactory' 
to JNDI name 'java:activemq/TopicConnectionFactory'

Now our environment is ready to go.