In this post I will go through an example to verify our ActiveMQ - JBoss Integration, which we discussed in an earlier post.
Software Requirements
Eclipse
JBoss Application Server 6.0.0
JSF 2.0
JDK 1.6+
This article used Windows XP Professional as the operating system.
Development
We start our example by building EJB tier.
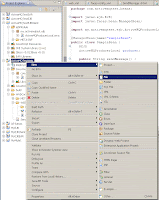
Step 1: Create an EJB Project in Eclipse. File -> New -> Project -> EJB ->EJB Project.
Click Next.
If you haven't created a Server Runtime for JBoss v6.0, create one now. Click New button in Target Runtime Section.
Since the version or Eclipse we downloaded doesn't show an option to add JBoss v6.0, add a Server Runtime with JBoss v5.0 with Server home directory pointing to JBoss v6.0 installation folder.
Select JBoss v5.0 and Click Next. Select JBoss v6.0 Installation folder as the Application Server Directory.
In the New EJB Project Window, enter ActiveMQTestEJB as the project Name. Make Sure JBoss v5.0 Server Rumtime which we created in the last step as the selected Target Runtime. Select EJB Module Version as 3.0. Select Default configuration in Configuration section. Select Add project to and EAR and click New. Enter ActiveMQTestEAR as the EAR Project name.
Click Next.
Click Next.
Make Sure Create and EJB Client JAR option is selected and Name is ActiveMQTestEJBClient and Client JAR URI is ActiveMQTestEJBClient.jar. Click Finish.
Now you will be able to see 3 projects created in your workspace.
- ActiveMQTestEAR
- ActiveMQTestEJB
- ActiveMQTestEJBClient
Right click the EJB project and Select New->Message Drive Driven Bean (EJB 3.x).
Enter following details:
Java Package : my.activemqtest.ejb
Class Name : ActiveMQConsumerBean
Select JMS
Select Queue as the Destination type.
Click Next. Accept default values and Click Finish.
Edit @MessageDriven Annotation to add ActiveMQ queue information as shown below.
@MessageDriven(activationConfig = {
 @ActivationConfigProperty(propertyName="destinationType",
                           propertyValue="javax.jms.Queue"),
 @ActivationConfigProperty(propertyName="destination",
                           propertyValue="queue.outbound"),
 @ActivationConfigProperty(propertyName="acknowledgeMode",
                           propertyValue="Auto-acknowledge")
 })
@ResourceAdapter("activemq-rar-5.3.0.rar")
public class ActiveMQConsumerBean implements MessageListener {
public ActiveMQConsumerBean() {}
public void onMessage(Message message) {
System.out.println("Message Received. Message Type is " + message);
}
}
Step 3: Create an EJB 3.0 Stateless Session Bean to post messages to ActiveMQ queue.
Right click ActiveMQTestEJB project -> New -> Session Bean (EJB 3.x).
Enter following details:
Java Package : my.activemqtest.ejb
Class Name : ActiveMQProducer
State Type : Stateless
Business InterFace : Local
Click Next.
Accept default values and click Finish.
Now we need to inject necessary resources into this stateless Bean using @Resource annotation.
Inject QueueConnectionFactory as below.
@Resource(mappedName="java:/activemq/QueueConnectionFactory")
 private static QueueConnectionFactory factory;
Inject Queue as below:
@Resource(mappedName="activemq/queue/outbound")
 private static Queue queue;
Implement message sending logic in a method.
@Stateless
public class ActiveMQProducer implements ActiveMQProducerLocal {

    @Resource(mappedName="java:/activemq/QueueConnectionFactory")
    private static QueueConnectionFactory factory;

    @Resource(mappedName="activemq/queue/outbound")
    private static Queue queue;

    public ActiveMQProducer() {}

    public void sendMessage() {
      try {
            QueueConnection qcon = factory.createQueueConnection();
            QueueSession qsession = qcon.createQueueSession(true, 0);
            QueueSender qsender = qsession.createSender(queue);
            TextMessage message = qsession.createTextMessage();
            message.setText("This is a test message");
            qsender.send(message);
            qsender.close();
            qsession.close();
            qcon.close();
      } catch (JMSException e) {
            e.printStackTrace();
      }
    }
}
package my.activemqtest.ejb;
import javax.ejb.Local;

@Local
public interface ActiveMQProducerLocal {
    public void sendMessage();
}
Step 4: Now it is time to create the UI. I have choosen JSF 2.0 web framework to create the UI.
Click File -> New -> Dynamic Web Project.
Enter following details in New Dynamic Web Project window.
Project Name : ActiveMQTestWeb
Dynamic Web Module Version : 2.5
Configuration : Default Configuration
Add ActiveMQTestWeb project to ActiveMQTestEAR.
Click Finish.
Now add JSF 2.0 support for our web application module. Add Faces configurations into web.xml.
<?xml version="1.0" encoding="UTF-8"?>
<web-app xmlns:xsi="http://www.w3.org/2001/XMLSchema-instance"
            xmlns="http://java.sun.com/xml/ns/javaee"
            xmlns:web="http://java.sun.com/xml/ns/javaee/web-app_2_5.xsd"
       xsi:schemaLocation="http://java.sun.com/xml/ns/javaee
       http://java.sun.com/xml/ns/javaee/web-app_2_5.xsd"
       version="2.5">
 <servlet>
   <servlet-name>Faces Servlet</servlet-name>
   <servlet-class>javax.faces.webapp.FacesServlet</servlet-class>
 </servlet>
 <servlet-mapping>
   <servlet-name>Faces Servlet</servlet-name>
   <url-pattern>*.jsf</url-pattern>
 </servlet-mapping>
 <context-param>
   <param-name>javax.faces.PROJECT_STAGE</param-name>
   <param-value>Development</param-value>
 </context-param>
 <welcome-file-list>
   <welcome-file>index.jsp</welcome-file>
   <welcome-file>index.html</welcome-file>
 </welcome-file-list>
</web-app>
Next we will create a web page to test our ActiveMQ producer EJB and Receiver EJB. Create an XHTML in the our "ActiveMQTestWeb".
Right click "ActiveMQTestWeb" project -> New -> File.
Enter "SendMessage.xhtml" as the file name and click "Finish".
<!DOCTYPE html PUBLIC "-//W3C//DTD XHTML 1.0 Transitional//EN"
  "http://www.w3.org/TR/xhtml1/DTD/xhtml1-transitional.dtd">
<html xmlns="http://www.w3.org/1999/xhtml"
      xmlns:h="http://java.sun.com/jsf/html">
<h:head><title>JSF 2.0: ActiveMQ Message Sending Test Page</title>
<link href="./css/styles.css"
      rel="stylesheet" type="text/css"/>
</h:head>
<h:body>
 <h:messages/>
 <h:form>
  <h:commandButton value="Send Message" action="#{sampleBean.sendMessage}"/>
 </h:form>
</h:body>
</html>
package com.activemqtest.beans;

import javax.ejb.EJB;
import javax.faces.bean.ManagedBean;

import my.activemqtest.ejb.ActiveMQProducerLocal;

@ManagedBean(name="sampleBean")
public class SampleBean {
 @EJB
 ActiveMQProducerLocal producer;

 public void sendMessage() {
   producer.sendMessage();
   FacesContext.getCurrentInstance().addMessage("form1:btn",
  new FacesMessage("Message Send successfully"));
 }
}
Deploy the application JBoss Application Server and you are ready to go.
Resources
ActiveMQTestEAR.ear


Hi Naveen...I am new to activemq.I am using switchyard for creating web services.I have a requirement to create a queue with an initial delay of 10 hours(messages placed in the queue should be available only after 10 hours.And another web service adds messages to the same queue with a different initial delay of 2 hours).My understanding was that to use activemq, we just need to add the necessary jars to the class path and use it straight away.But it seems that is not correct.Could you please guide me on how to integrate the activemq in jboss 6 fuse server?Please see my sample snippet i used from switchyard.xml.I want to convert it to an activemq element.Is there an easier way to do this?
ReplyDeleteSomeQueue
#ConnectionFactory
This does not since jms does not support delayed queues.
The requirement is that the delay should be configurable.
Thanks
Vinod